Imagine vast expanses of sky, free from air and light pollution, with even low magnitude stars are visible to the naked eye and a dizzying array of lights dance overhead. The polar regions are home to some of the most fantastic and original photography opportunities on the planet. However, conditions can make these areas among the most challenging for photographers, as well.
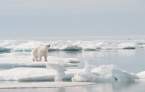
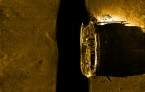
 Photo courtesy of Dr. Sam Crimmin
We've discussed how to protect your photographic equipment in extreme weather conditions, as well as tips for taking great pictures with your smartphone. Now, we'll tackle the challenge of getting the best photos of the spectacular Northern Lights and starscapes in low-light conditions.
If you're traveling to the Arctic or Antarctica this upcoming season, use these tips to prepare to capture the stars and the Northern Lights in all their glory, with clear, crisp photos you can use to relive your adventure for years to come.
 Know Your Levels of Low-Light
1. Know Your Levels of Low-Light
We tend to think of low-light photography as a nighttime activity, yet you may need to use low-light tactics anytime the light you're dealing with is lesser than natural daylight. Mountains, cliffs, glaciers, low cloud cover, weather systems and more can all affect the amount of light available to you, as well as how shadows play on the landscape.
Humans are actually able to see more light than cameras do. Even if you think there's enough light while you're shooting, you may be disappointed to find your photos blurry later on. Try using a higher shutter speed to reduce shake and motion blur when conditions may offer some lower level of light – even in the daytime! See Photography Life's Understanding Shutter Speed – A Beginner's Guide for more on choosing the optimal shutter speed.
2. Use a Tripod
A tripod is a must for shooting in polar regions, particularly in low light conditions. This simple stabilizing equipment can help you improve your image sharpness, depth of field, capture quality, framing precision and focal-length range.
When you're shooting in low light and using a slower shutter speed to let in as much light as possible, even the slightest movement can cause blurring. Using a tripod reduces camera shake, enabling you to experiment with a wider variety of camera settings and go after far longer exposures that may take seconds, minutes – or even hours.
Bonus: using a tripod makes for smooth panning and tilting if you're trying to capture the Northern Lights or other polar scenes on video.
3. Lower your Aperture to the Lowest Number Possible
Shooting at faster shutter speeds requires more light, so you'll need to decrease your lens aperture. Aperture is the photographic element that allows you to blur a background, or bring everything into stunning focus, and has a direct impact on depth of field.
Aperture is expressed in f-numbers, ie.: f/2.8 or f/5.6, that basically describe how open or closed the aperture is. The larger the f-number, the smaller the aperture – and the larger the f-number, the better it is for low-light photography.
4. Adjust ISO
ISO is the sensitivity of your camera to light. Adjusting your ISO can help you better capture images in low-light settings, but it can also have the unwanted effect of adding noise to your images, making them grainy.
ISO numbers generally start at 100 or 200 and usually, you would want to use the lowest ISO possible to get the clearest pictures. However, when you're shooting in low-light conditions, it can be beneficial to use a higher ISO. As you increase to ISO 400, 800, 1600 and beyond, you're doubling the sensitivity to light and reducing the amount of time needed for a clear shot.
This is critically important when you're shooting the Northern Lights.
 Photo courtesy of Quark passenger Robert Lee
With still shots of starscapes, ISO isn't as much of a concern. You can afford the slower shots. However, Northern Lights often "dance" and move unpredictably in the sky. Using a combination of a higher ISO with your chosen shutter speed and aperture can help you capture clearer photos of faster moving Northern Lights shows.
5. Practice Makes Perfect
None of this is an exact science! Conditions are constantly changing in the extreme Northern and Southern skies.
Before your expedition, spend some time with the camera equipment you'll be using in the polar regions, in low-light settings. Use a tripod and experiment with your aperture, ISO and shutter speed to see if you can identify optimal settings for different low-light situations you may encounter.
Familiarize yourself with your camera's capabilities now and you'll be able to cycle through different combinations of settings faster in the moments that matter – when the brilliant South Georgia sky takes your breath away, or you would swear you could reach out and touch the Northern Lights in East Greenland.
Of course, our Quark Expeditions community of fans, staff and passengers have the most in-depth knowledge on everything polar! If you have low-light photography tips to share, please do in the comments.